

My Golden Doodle Stan Lee' Eyes: Views in our Boston Home
See What My Golden Doodle, Stan Lee Sees Around Our Home and Learn How To Select the Best Photos. Plus, A Simple Seven Survey.

What does the world look like through a Golden Doodle’s eyes?
In this Boston-based photography project, I capture our home from the perspective of Stan Lee — my not-so-average Golden Doodle. You’ll see what he sees, learn how dogs view the world, and discover how I cull and print photos to select the best work.
Today I’m sharing three parts of my photography journey that come together in this post — and one announcement:
A workshop assignment I tackled: Photograph within 100 feet of my front door
A creative twist on that assignment: Seeing through the eyes of my Golden Doodle, Stan Lee
Lessons I’ve learned about photo culling
And a big thank you: I’ve passed 100 subscribers in < 60 Days! Please click the button to answer my Simple Seven Survey.
My Project: Photograph within 100 Feet of My Door and Pick Your Best 15
Last year, I took a photography workshop called Street Photography: A Praxis, led by the amazing Michael Hintlian — a terrific photographer and a sharp, effective teacher.
The first assignment was deceptively simple:
Shoot photos within 100 feet of your door.
No further instruction. Just… go.
My Assignment Topic: From Stan Lee’s Eyes, How My Golden Doodle Sees His Home
To break free from a mechanical mindset and embrace a more creative one, I decided to view this assignment from a different angle — literally. I placed myself at Stan Lee’s eye level and imagined the world from his point of view.
Stan Lee isn’t your average doodle. We call him our “Macro-Doodle” — he towers over the micro and mini doodles we meet
So, my first part of the project, I measured his height, mainly on how high his eyes were from the ground, or how far above his chin his eyes appear. That became my guide for tripod height and composition.
And then, of course, the tech/science brain kicked in.
What Does the World Look Like to a Dog?
Have you ever really thought about how dogs see? I hadn’t — but now I have.
It turns out, dogs like our Golden Doodle friends, don’t see colors the same way we do. I grew more curious about how that affects his world.
So, I looked into the science of canine vision — and it’s surprisingly different from ours. Dogs don’t see the full spectrum of colors that we do. Humans have three types of color receptors (cones) in our eyes (red, green, and blue). But dogs only have two types — blue and yellow — which means their color vision is more limited.
And here’s a breakdown of what I learned:
Red and green hues are absent in a dog’s view. What looks red to us might be dull brown or gray to them.
Blues and yellows pop — they’re the vivid notes in a mostly-muted world.
Dogs have blurrier distance view, soft focus instead of crisp edges.
Low-light vision is superior, thanks to extra rods and the tapetum lucidum (a light-reflecting eye structure).
Motion sensitivity is heightened — they detect even small movements quickly.
Learning about these differences helped me imagine the world from my dog’s perspective more clearly — not just as a fun idea, but through an understanding of how their eyes actually work. So I made the edit adjustments, using Lightroom and I believe it grounded the entire project in empathy and experimentation.
About the Class - Field and Classroom Critique
The class met weekly. One week you had an assignment and met up in a location to shoot in a field assignment. Then, the next week, you meet in a classroom. The field assignments were usually three to four hour stints, or could be over many days. These assignments, like my Street photography Photowalks, rarely yield less than 200 or 300 photos at each shooting session.
Then came the challenge: bring no more than 15 images to class. (OK, I cheated and brought 17 the first time).
Those 15 were laid out on a table for review. And the rule? You stay silent. You answer questions only — no defending your work. Let the images stand and speak for themselves…
It was like being behind a one-way mirror while a focus group critiques your portfolio. Strangers circling your images, calling out strengths and flaws. Uncomfortable? Sure. But effective? Absolutely.
Photography Critiquing Process - Brilliant.
We also used a shared set of critique principles and common language — a helpful anchor when discussing each image. Each reviewer explains their perspective about an image in terms of four dimensions. Michael taught us the process with only the first three. I may be wrong, but in my personal experience, (not an expert), To me, as a customer centric business guy, I feel there is a fourth principle, Viewer Visceral Response. I usually incorporate wherever I can. What do you think?
The Photography - The science, techniques, process and engineering of images from the shot through processing and delivering it.
The Subject - The clarity of the object or subject in the image.
The Photographer - Their imprint on the image. What has the photographer put into it that comes out of it.
Viewer Visceral Response. Is there one? Is it expected or is it a surprise? Does it engage viewers, how and to what degree.
Over Time Patterns in Our Shooting Emerge in Our Work and The Group Picks up On It.
Over time, patterns emerged: stylistic tendencies, growth, blind spots. One classmate consistently produced great images with 5 things in them. 5 Trees, 5 people usually in tight symmetry. We noticied it before she did and brought it to her attention. As a part of the class, Michael supported this by showing examples from known photographers with similar visual signatures.
I took the class twice. I’ll likely take it again — for the feedback, the structure, the accountability. Like a good study group, it pushed me forward.
Why This Post, and Why Now?
The Substack posts by many writers, photographers, and artists inspired me to start my publishing and posting journey here. I can’t believe this is Post #11 in 11 weeks.
One of those special people on Substack is Susanne Helmert, the publisher of the My Morning Muse. I started following her work last year. Her thoughts, artistry, writing and photos she shared drew me in.
Susanne’s recent zine One K Radius, resurfaced this assignment in my mind. Susanne’s morning walks — with camera and dog — inspired me to share my own neighborhood experiment.
Her early personal encouragement helped shape my first few posts. Our styles differ, but the exchange of ideas has been powerful. There’s power in small, creative radii.
She is currently living in Germany, and partnered up with another artist/photographer on a different continent. This post of hers "My thoughts on art collaborations" tells you more about it. Putting two and two together, my 100 feet from the door assignment moved forward for this post.
I also want to acknowledge the many other mentors, friends, photographers and artists I have met in the last few years who dramatically affected me as well.
The Real Challenge
So, the real challenge for this class or most photography assignments is:
How do you Cull from hundreds or thousands of photos down to the handful that are exceptional?
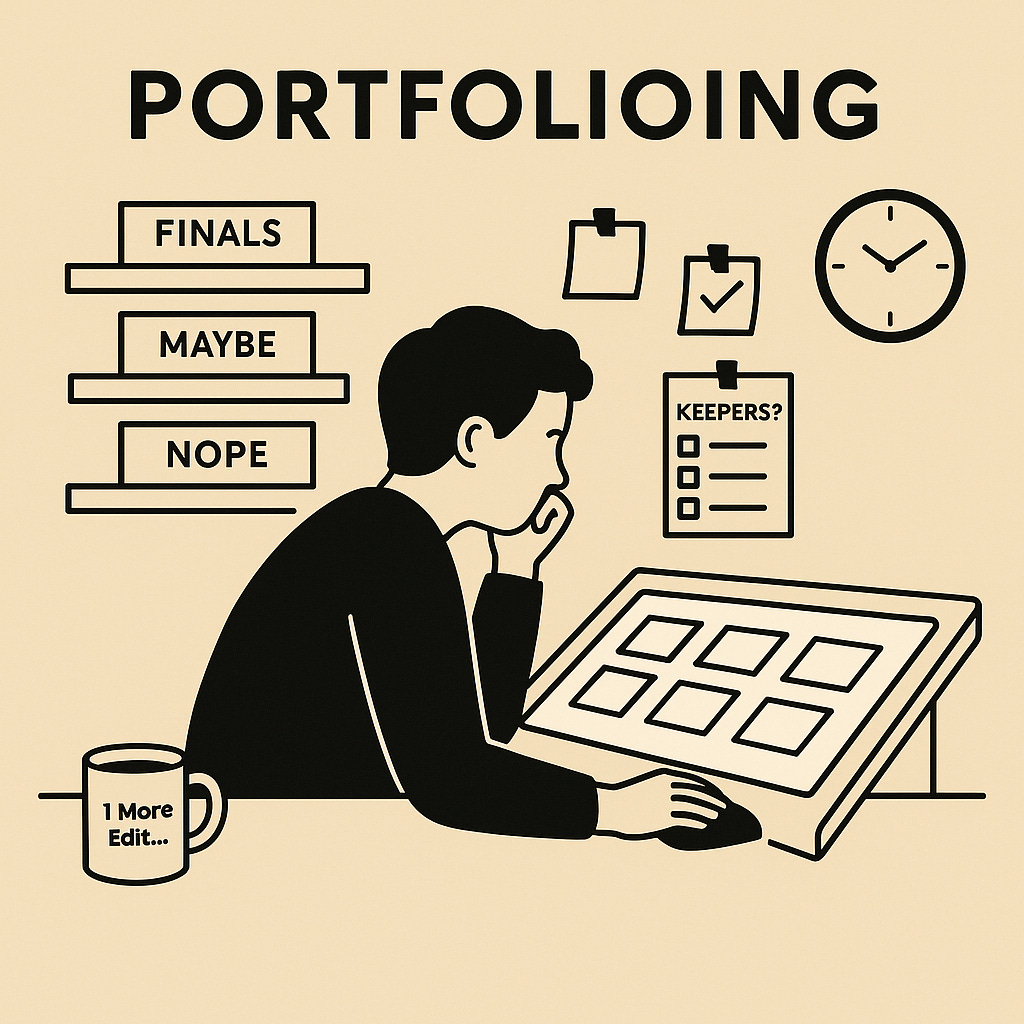
The Culling Process Preamble: (its better than “Introduction”?)
While I have been shooting images since I was 14, it wasn’t until the last few years, where I have studied and learned to practice smarter workflows of photographers and photography. To make this post more interesting, I am sharing the processes I use through the lens of this assignment.
The process speaks to the approach to getting down to your handful of "A" images that you select from the tens, hundreds or thousands of photos shot.
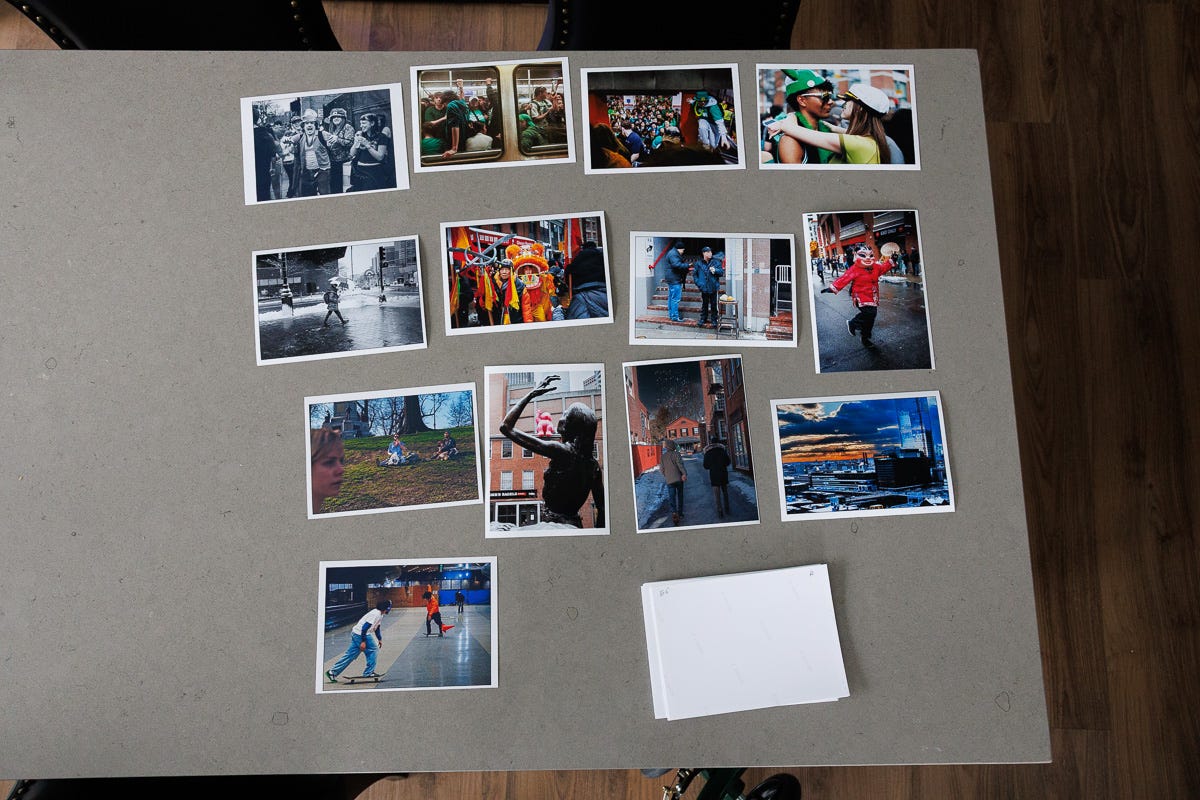
I had a week to shoot, process, print, and deliver my top 10-15 images. Here is what I got:
I took 126 photos around my home, no more than 100 feet away
Culled the list to 37 Photos "Selects"
Winnowed Down to 21 in the next grouping by creating Selects A group.
Finalized my “A” Group list of 15 pictures to fit the assignment.
I tried really hard to winnow down below the 15, but couldn’t let some photos go. All done Lightroom Classic, including collections for Selects and Top. As shown in the image below.

Next STEP: PRINTING VERY IMPORTANT PART!
When I got to the 37 photos in Lightroom, I then started some editing/processing work on them. “I SHOOT RAW” (as Jared Polin of FroKnowsPhoto says). RAW files are pretty flat, low contrast, and mildly saturated colors, as your starting point, but are full of processable bits. A few simple adjustments with nominal cropping, bring them to life.
Then I print all 37.
Physical Prints in My HAND: What a difference!
What I have learned, mainly formed in the last couple of years, is that for myself, and not for client work in photography, you do not want to spend time processing ALL 126 images for this project. While there are some global adjustments you can make to all the photos, its not worth the time working individually on all photos, only the ones that make your A or B lists.
To get from the 37 to the 15, is so much easier with a 5x7 (my preference) glossy photo in hand. While LR give you a "Grid" to view all the pictures side by side, putting them all on a table, or floor, broadens your view and ability to look for similar photo clusters. Once similar types of shots are found you can then start winnowing down by selecting the one photo with the subject, composition, and photographer value in it compared to others. Other photos when you think about the photography, the subject, what inspired you, and how do you react is much more intimate and objective with a print in-hand!
Sidebar: Thank YOU! 🫵
Thanks to you — my readers, subscribers, and email openers — I’ve crossed 100 subscribers in under 60 days!
And now, a small ask:
I’ve put together a 7-question survey that’ll help me shape this publication going forward. Totally anonymous. Totally appreciated.
Please take a moment and share your thoughts.
I’m one guy, doing this solo. Every answer helps. See the Survey Below: 👇
Selecting my 15: What happens to the Rest?
So as I narrowed down to the 15, many of the discarded selects fall into the "B" Category. I move them off the table and place in a plastic, see through box of “B” shots. I sill may work on these B photos, but I spend most of my time with my A's. At the end of each session reviewing my photos, I then mark the back of the photos, as A or B or nothing if it falls back from B.
But let me clarify something, I have learned as well. At the end of all this process, there may only be one or two that stay and remain "A" work and get added into my longer term body of work. I will be lucky if 1 or 2 survive at all from a group like this. When I do my photowalks, I may shoot 400-600 shots in a 4 hour period or more than 1,000 a day for bigger events. In any case, I will be lucky to find more than 4 or 5 keepers.
The image below is a spread of photos over 6 months at the beginning of 2025. While they are not gallery ready, directionally you see what they look like and can pick up one, two , three or more to view in different light, next to others to compare and assess.
You pick one up. Feel it. Shift it under sunlight, lamp light. Compare it. Stare at it closer. Move around the room and look in sunlight, shade, or under a lamp. You can simulate that in lightroom, but it’s not the same.
And sometimes while starting and reviewing an image, I can give it the all important “Sniff Test”! 🥸
Remaining Images
So the photos below are the ones from the collection not shown yet. Some additional Diptychs and singles to view from my assignment. After that, you will see some “A”s of the “Monster,” Stan Lee that are framed on display at home.

Stan Lee watches from the couch while I am on my computer. He is not able to help me resolve color and tint issues on my images.
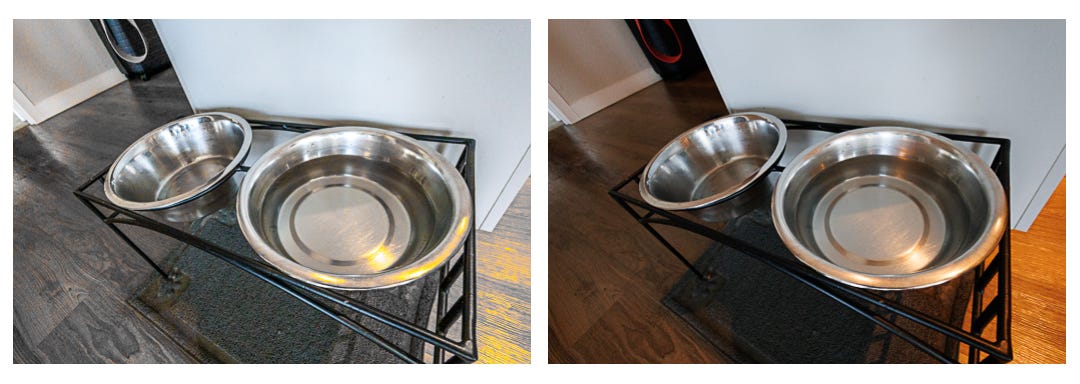
Just a normal day at the trough from Stan Lee’s vantage point.
Stan Lee does not like to wait alone. He often lies next to one of his favorite toys, the gray Sloth. Patiently, they both wait together for someone, anyone to come home.

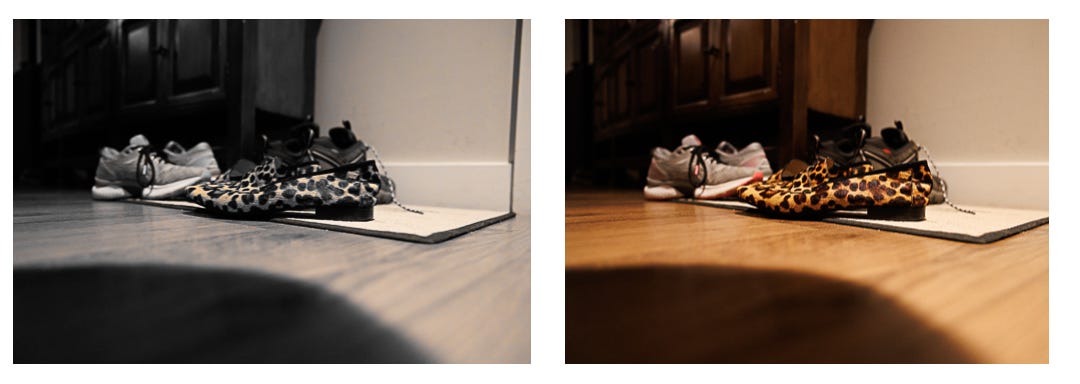
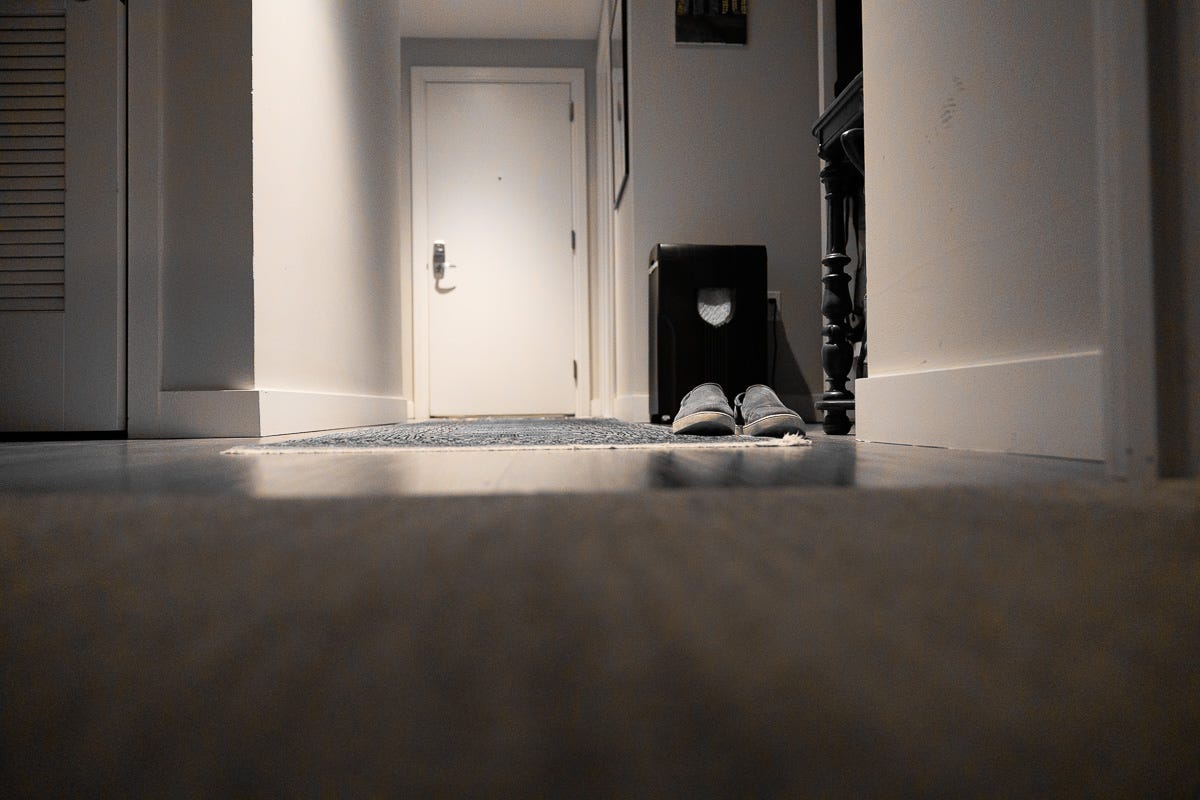
Stan Lee waits for one of us to come home and keep him company and active. Its a long hallway and view to the door. He always has our shoes to smell and remind him of us. 👃

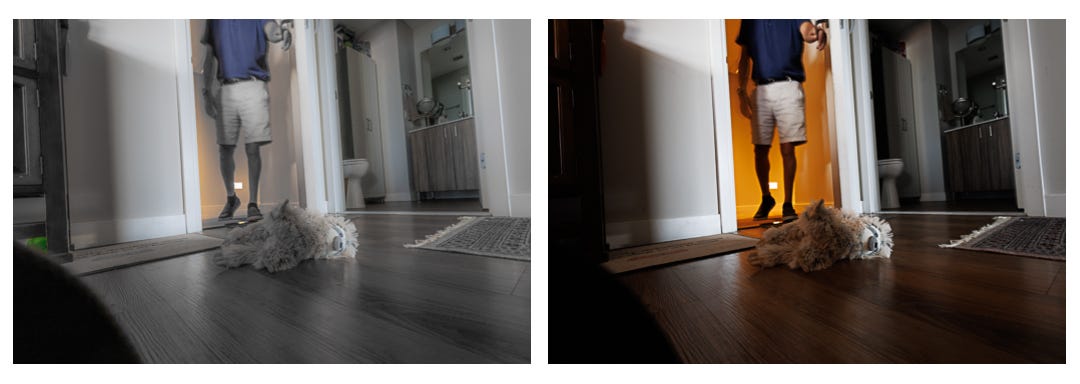
I call Stan Lee and ask him if he wants to go out, while holding his gentle leader from his vantage point. In return, I see Stan Lee looking at me, excited for what’s next.
And, Finally, one of my favorite “A” shots of our “Best Child”, Stan Lee at the Beach in Sag Harbor last year. Caught in mid-air, not even touching the ground as he runs, off-lead, to me.

Don’t pass up helping to guide this publication and provide some guidance as I am 60 days into this new Publication.
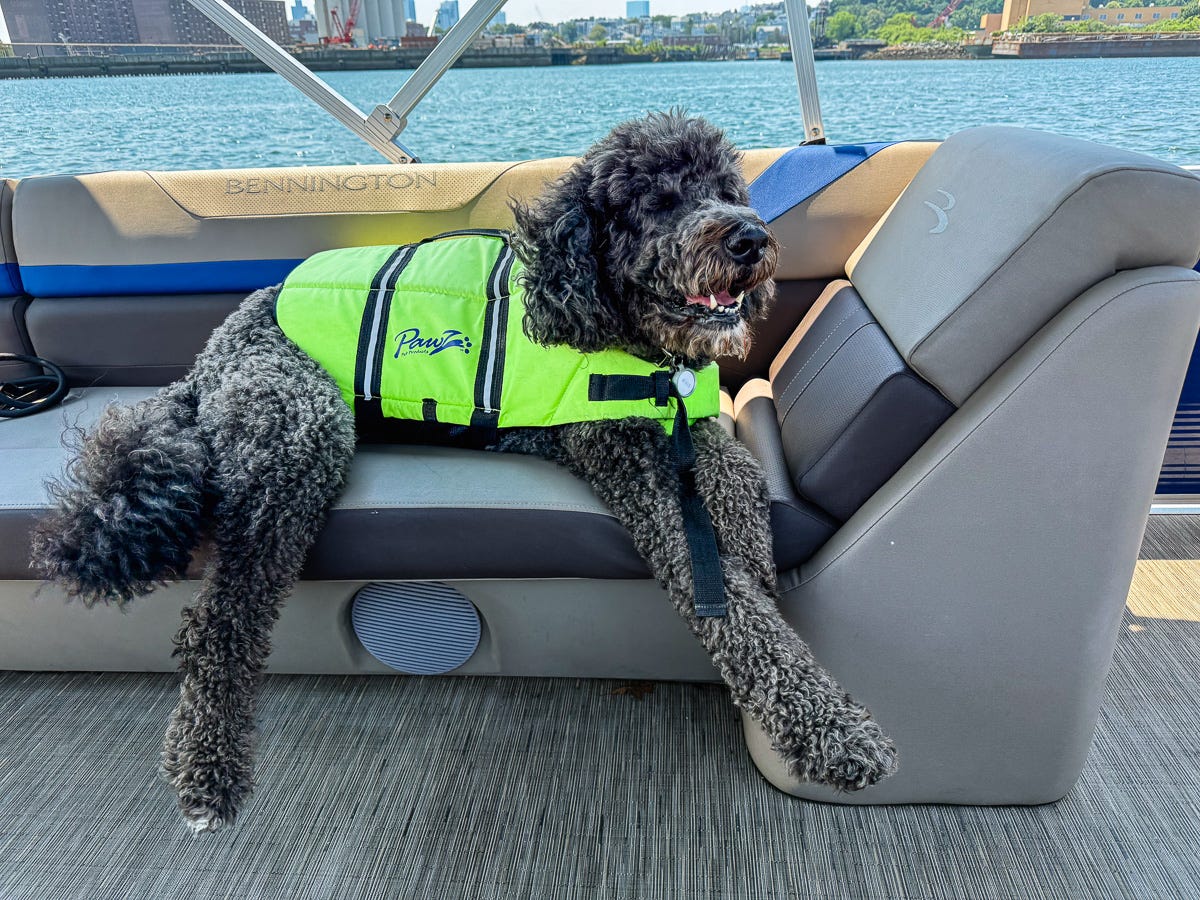
Finally, Out on the Boat Again
I couldn’t end this without showing my Boat Buddy, Stan Lee on the boat again with me. Both of us are in our Zen Time when cruising Massachusetts Bay-Boston Harbor with the window in our faces and Sun giving us our Vitamin D.
Thanks for reading IMAGE FRONTIERS Photography by David Rosen! This post is public so feel free to share it.
And, If high-rise photography is your thing, check out 14th Floor Views – Boston
But wait, that’s not all!
Lessons learned 🧠
Print your Best Work - LRC and Software Are Valuable, but paper reveals the truth.
Favorites Change & Nothing Remains the Same: A’s become B’s. B’s sometimes rise again. But that is good. That is progress. Hopefully your work improves and evolves over time and new work or old work comes into your vision house.
Move, Get Out of Your Habits (and create new ones): As a lifelong learner, it was exciting and invigorating to learn how dogs see and position my camera in their visual trajectory. In Street photography, its often about the dance. Sometimes you lie on the ground or crouch to get the shot, other times you move within feet of your subject to get that “in the scene” perspective as opposed to being a viewer of the scene.
Keep Working and Creating. I feel this vibe and voice in my head from my photographer and artists friends, acquaintances, and mentors. Keep shooting, keep moving, and build your body of work are the common themes. It reminds me a lot of Malcolm Gladwell’s the Tipping Point.
Your Turn 🤔
So, if you have made it this far, what do you think?
When shooting for yourself, (not client work) how many images do you shoot and what numbers become “A” and “B” photos do you get?
How do you cull your photos and is there a method you use?
Does this process sound helpful or too much?
Closing Thought This Week
I want to thank my beautiful, supportive and funny wife Lynn, my Bashert (soulmate). We celebrated and still celebrating, our 31st wedding anniversary this week.
And thanks to YOU for coming with me on this journey.
I even made it out yesterday (no knee scooter!) for poker in the burbs. New pics coming soon. 😄
So tell me—WHAT’S UP with YOU? 👀 What are you shooting, seeing, exploring, or just thinking about this summer?
Copyright Stuff
All photographs and images were taken and produced by me, David Rosen. Feel free to share this post by linking to it, re-stacking, or creating notes to spread the word! The images may not be reproduced or distributed without my explicit permission. If you would like to use the photos, I'd be glad to accommodate you — so please contact me at Click@davidrosenphoto.com. Thank you for supporting my work—subscribe or share to stay connected with my photography journey.
This description of Michael's 3rd and most nebulous leg is well-put: "The Photographer - Their imprint on the image. What has the photographer put into it that comes out of it."
"Air Stan Lee" is a great photo!!!! ❤️